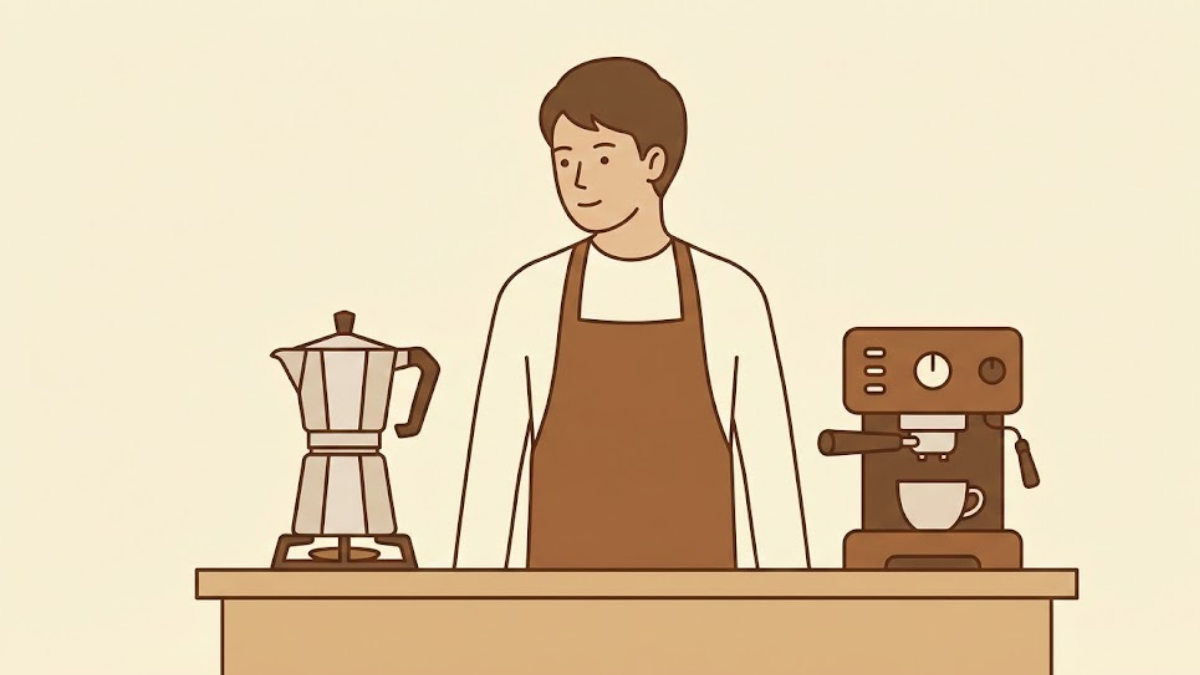
A moka pot is a stovetop espresso maker that uses steam pressure to brew strong, concentrated coffee.
Invented in Italy in 1933, it remains one of the most popular home brewing methods in Europe and among coffee enthusiasts who want rich, espresso-style coffee without an expensive machine.
If you've wondered how to make that bold, full-bodied Italian coffee at home, or you're confused about whether a moka pot is right for your kitchen, this guide explains exactly how it works, what it does well, and where it falls short.
Understanding a moka pot means knowing what you're actually getting: not true espresso, but something closer to it than drip coffee or a French press. The brewing process is simple but unforgiving.
Small mistakes in grind size, heat level, or coffee quantity produce bitter, metallic, or weak results. This article walks through the mechanics, the process, and the practical realities of using one daily.
Quick Comparison: Moka Pot vs. Other Brewing Methods
A moka pot sits between espresso and drip coffee in terms of strength and preparation style. Here's how it compares to methods you might already use:
| Brewing Method | Brew Time | Strength | Pressure | Skill Level |
|---|---|---|---|---|
| Moka Pot | 4–5 minutes | Strong, concentrated | Low (1–2 bar) | Medium |
| Espresso Machine | 25–30 seconds | Very strong, thick crema | High (9 bar) | High |
| French Press | 4 minutes | Medium body | None | Low |
| Pour Over | 3–4 minutes | Clean, light | None | Medium |
| Drip Coffee Maker | 5–8 minutes | Mild to medium | None | Low |
The moka pot produces coffee that's roughly twice as concentrated as drip coffee, but it lacks the crema and full intensity of espresso.
It's best for people who want strong coffee quickly without investing in expensive equipment or learning complicated techniques.
Things You'll Need to Brew With a Moka Pot
Before you start, you need the right setup. A moka pot won't work correctly if you skip these basics:
- A moka pot in the correct size: Moka pots are sized by espresso cups (1, 3, 6, 9, or 12 cups). One "cup" equals about 2 ounces. A 3-cup model brews roughly 6 ounces of coffee, which is one normal mug. Always fill the pot completely—underfilling produces weak, sour coffee.
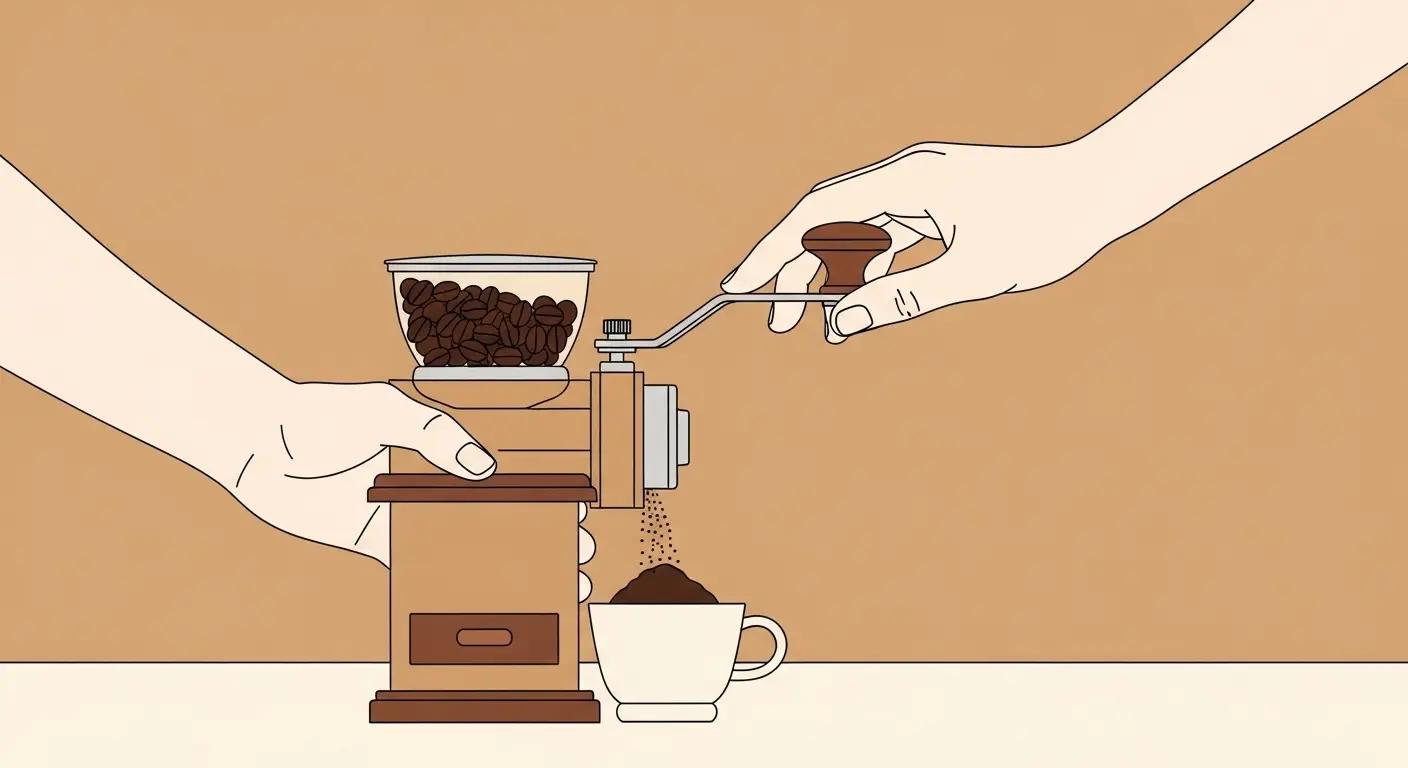
- Medium-fine ground coffee: The grind must be finer than drip but coarser than espresso. If it's too fine, the coffee tastes burnt and the pot may sputter violently. If it's too coarse, the brew will be weak and watery. Pre-ground espresso coffee usually works, but fresh-ground beans give better results.
- A consistent heat source: Gas stoves work perfectly. Electric stoves work but heat unevenly. Induction stoves require a moka pot with a magnetic base or an induction adapter plate. The heat must be medium-low. High heat burns the coffee and can warp aluminum pots.
- Cold or room-temperature water: Some people preheat the water to reduce brew time and avoid metallic flavors. Others use cold water straight from the tap. Both work, but preheating shortens the time coffee sits on the heat, which can improve taste.
- A timer or close attention: The brewing window is narrow. Once coffee starts flowing, you have about 30 seconds before it over-extracts and turns bitter. You can't walk away.
The decision that matters most is grind size. Too many people use the wrong grind and blame the moka pot for tasting harsh or weak.
If you're buying pre-ground, look for bags labeled "moka pot" or "stovetop espresso."
Step-by-Step Guide: How a Moka Pot Works and How to Use It
Part 1: Understand the Three-Chamber Design
A moka pot has three sections: a bottom chamber for water, a middle funnel basket for ground coffee, and a top chamber where brewed coffee collects. When you heat the pot, steam pressure builds in the bottom chamber.
That pressure forces hot water up through the coffee grounds, then through a central tube into the top chamber. The process is entirely mechanical—no electricity, no filters, no buttons.
The bottom chamber holds water up to the safety valve, a small metal screw on the side. Never fill past this valve.
If you do, the pot can't release excess pressure safely. The funnel basket sits inside the bottom chamber and holds the coffee. The top chamber screws onto the bottom and catches the finished brew.
This design hasn't changed in 90 years. The original Bialetti model from 1933 works exactly the same way as modern versions.
That consistency is part of the appeal, but it also means the moka pot has the same limitations it always has: you can't control temperature, you can't adjust pressure, and you can't stop extraction mid-brew without removing the pot from heat.
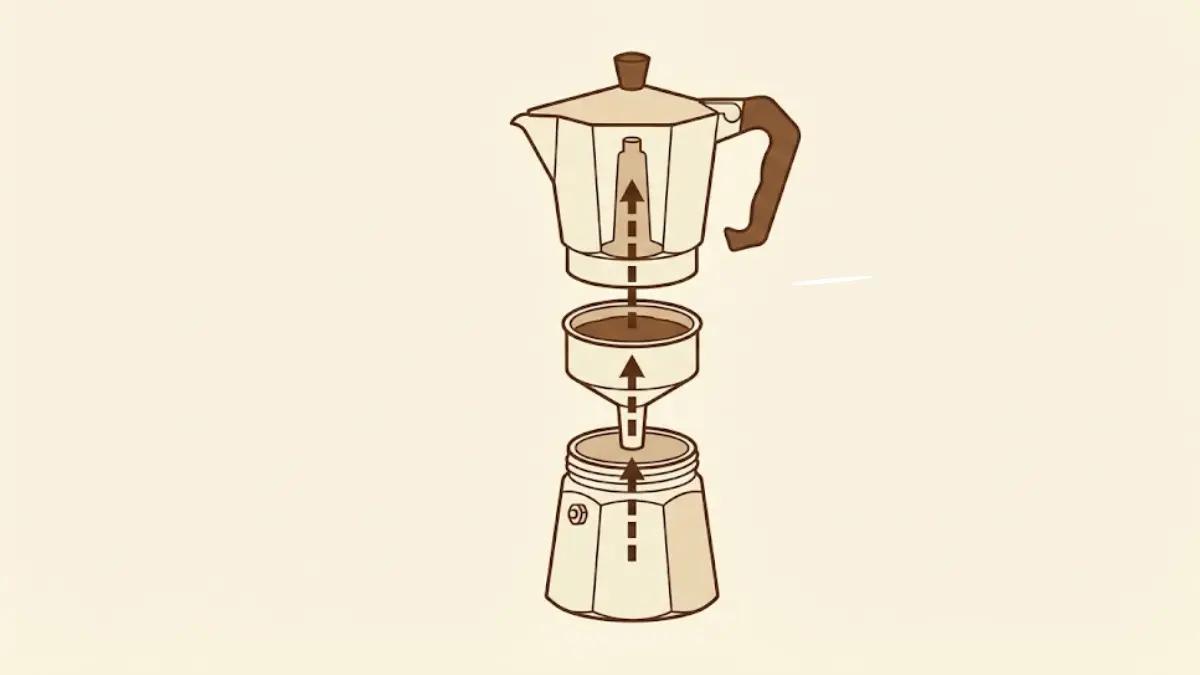
Diagram showing moka pot three-chamber design and water flow path
Part 2: Fill the Bottom Chamber With Water
Unscrew the top chamber and remove the funnel basket. Pour cold or room-temperature water into the bottom chamber until it reaches just below the safety valve. Don't cover the valve.
If you do, the pot can't vent properly, which is a safety risk.
Some experienced users preheat water in a kettle first, then pour it into the bottom chamber.
This reduces the time the coffee sits on the stove, which can prevent burnt or metallic flavors. If you preheat, the water should be hot but not boiling.
Boiling water can make the pot too hot to handle and doesn't improve extraction.
The amount of water matters. If you underfill, the pot won't generate enough pressure to push water through the coffee.
If you overfill, you risk blocking the valve. Always fill to the same level for consistent results.
Part 3: Fill the Funnel Basket With Ground Coffee
Grind fresh coffee to a medium-fine consistency, or use pre-ground moka pot coffee. Fill the funnel basket completely, forming a small mound on top.
Do not tamp or press the coffee down. Moka pots don't need compression like espresso machines do.
If you tamp, you'll restrict water flow, which can cause sputtering, uneven extraction, or a clogged filter.
Level the coffee by running your finger across the top of the basket. Wipe away any grounds on the rim or threads of the bottom chamber.
If grounds get stuck in the seal, the pot won't close properly, and steam will leak out during brewing.
Some people recommend slightly underfilling the basket to reduce bitterness. This works if your coffee tastes harsh, but it also weakens the brew.
Experiment to find what you prefer, but always fill the water chamber completely.
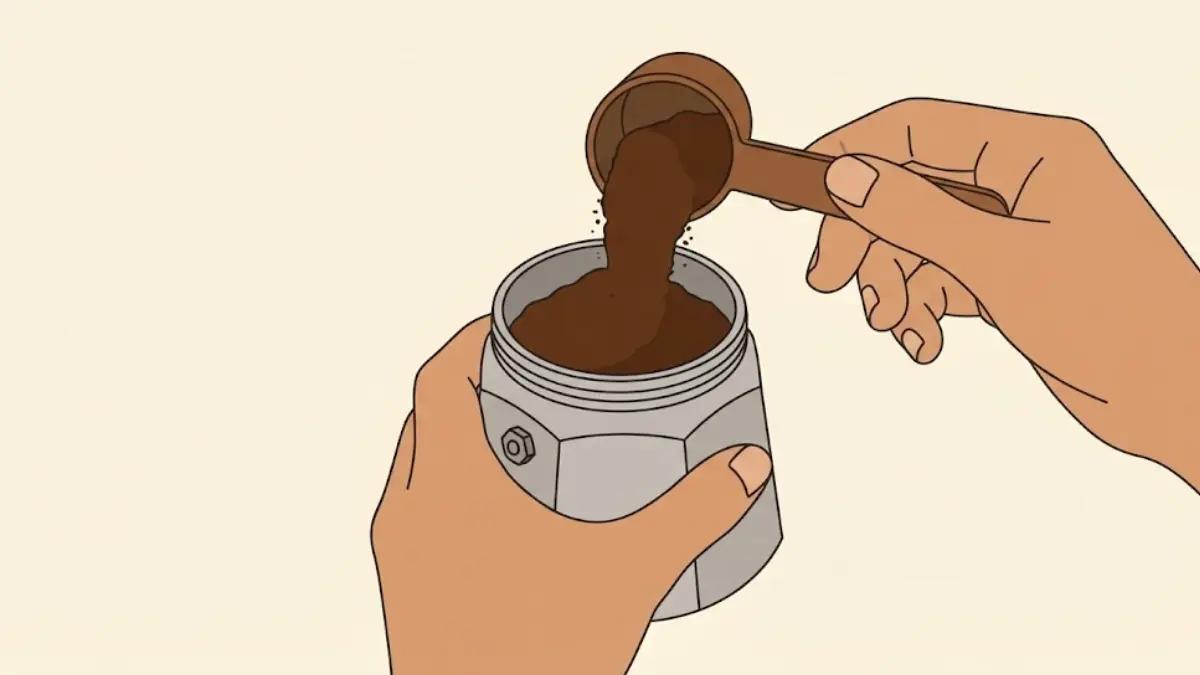
Filling moka pot funnel basket with ground coffee and leveling without tamping
Part 4: Assemble and Place on Medium-Low Heat
Insert the filled funnel basket into the bottom chamber. Screw the top chamber on firmly, but don't overtighten.
Aluminum moka pots can strip threads if you force them. Make sure the gasket (the rubber ring inside the top chamber) is clean and seated correctly. A worn or dirty gasket causes leaks.
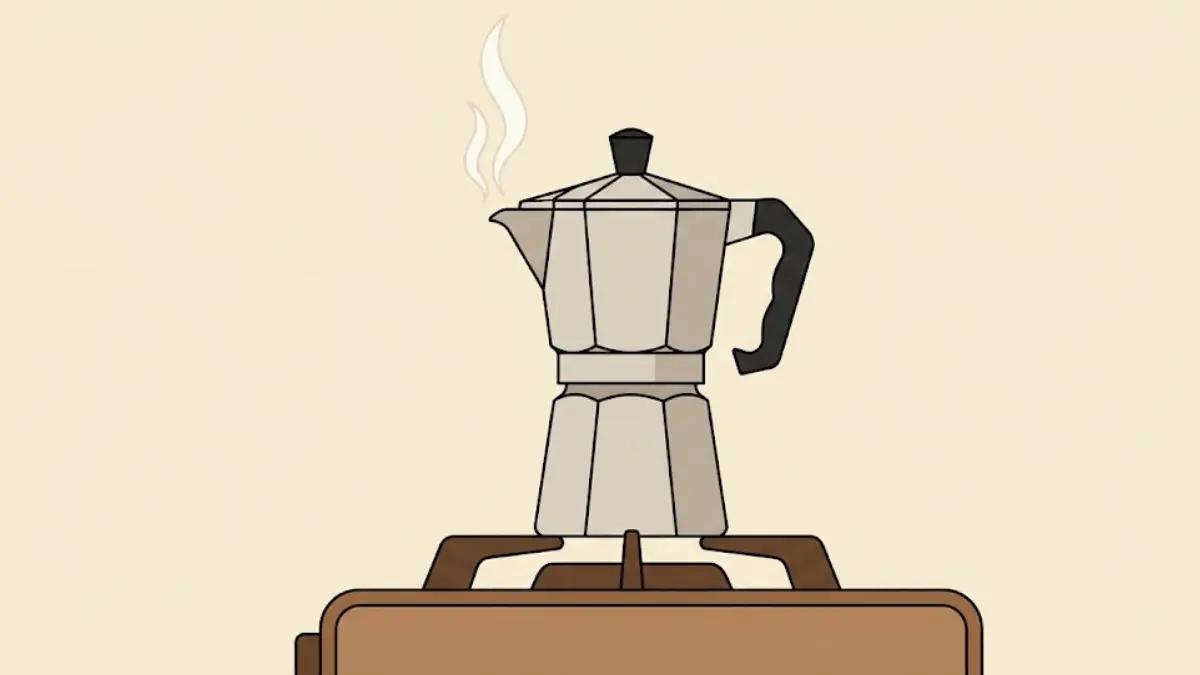
Place the moka pot on the stove over medium-low heat. If you're using gas, keep the flame smaller than the base of the pot.
High heat burns the coffee and can warp the aluminum. If you're using an electric stove, preheat the burner on medium, then place the pot on it.
Leave the lid open so you can see when coffee starts flowing. This is critical. You need to remove the pot from heat at exactly the right moment, and you can't do that if the lid is closed.
Part 5: Watch for Coffee to Start Flowing
After two to four minutes, you'll hear a light hissing sound. This means pressure is building.
Shortly after, coffee will start flowing from the central spout into the top chamber. It should flow smoothly in a thin, steady stream.
If it sputters violently or comes out in bursts, your heat is too high or your grind is too fine.
The coffee should be dark brown, not pale or weak-looking. If it's pale, your grind may be too coarse or your heat too low.
If it's very dark and bitter-smelling, your heat is too high.
As the top chamber fills, the flow will become lighter in color and the sound will change to a bubbling or gurgling noise.
This is the end of the brew cycle. The pot is now pushing steam and the last bit of water through the grounds, which extracts bitter compounds and overheated flavors.
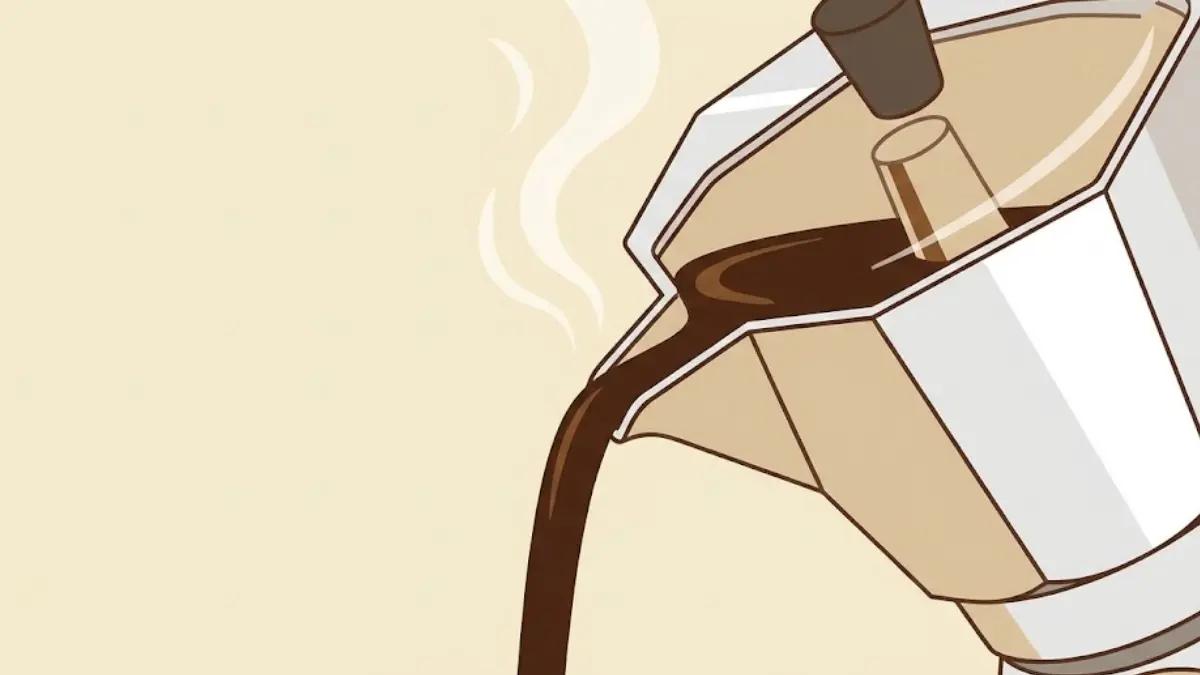
Coffee flowing from moka pot spout during brewing process
Part 6: Remove From Heat Before It Sputters
As soon as you hear a deep gurgling sound or see the coffee stream turn pale and foamy, remove the pot from the heat.
Don't wait for the sputtering to stop on its own. Those last few seconds over-extract the coffee and add harsh, burnt flavors.
Run the bottom of the pot under cold tap water to stop the brewing process immediately.
This cools the base, drops the pressure, and prevents the remaining steam from pushing through.
Some people skip this step, but it makes a noticeable difference in taste, especially if you're sensitive to bitterness.
Wipe the outside of the pot dry, then pour the coffee into your cup. Moka pot coffee is strong and concentrated.
You can drink it straight, dilute it with hot water to make an Americano, or add milk for a latte-style drink.
Pros and Cons of Using a Moka Pot
Pros:
- Inexpensive and durable: A basic aluminum moka pot costs $25 to $40 and lasts decades with proper care. There are no filters to replace, no electronics to break, and no ongoing costs.
- Brews strong coffee quickly: From start to finish, brewing takes four to five minutes. The coffee is roughly twice as concentrated as drip, making it ideal for milk-based drinks or for people who like bold flavors.
- Portable and simple: Moka pots work on any heat source, including camping stoves. They require no electricity, no special skills, and minimal cleanup.
- Widely available and traditional: You can find moka pots in nearly any kitchenware store. Replacement gaskets and filters are cheap and easy to source.
Cons:
- Narrow margin for error: Small changes in grind size, heat level, or timing produce noticeably different results. It takes practice to dial in a consistently good cup.
- Not true espresso: Moka pots don't generate enough pressure to produce crema or the full body of espresso. If you want real espresso, you need a machine that reaches 9 bars of pressure.
- Prone to bitterness and metallic flavors: Over-extraction happens easily if you leave the pot on heat too long. Aluminum pots can add a metallic taste if not cleaned properly or if used with hard water.
- Requires constant attention: You can't start a moka pot and walk away. You need to watch it and remove it from heat at the right moment, which makes it less convenient than automatic drip machines.
Buying Guide: How to Choose the Right Moka Pot
When choosing a moka pot, size matters more than brand. Moka pots are sized by the number of espresso cups they brew, with each cup equaling about 2 ounces.
A 3-cup pot makes 6 ounces of coffee—enough for one standard mug. A 6-cup pot makes 12 ounces, which is roughly two mugs.
Always brew a full pot. Moka pots don't work correctly when only partially filled, so buy the size that matches your daily consumption.
Material is the next decision. Aluminum pots are traditional, affordable, and heat evenly, but they can't go in the dishwasher and may develop a metallic taste over time.
Stainless steel pots cost more, resist corrosion better, and work on induction stoves, but they heat less evenly and can scorch coffee if the heat is too high.
If you have an induction stove, you need either a stainless steel pot or an induction adapter plate.
The most common brands are Bialetti, which invented the moka pot and still makes the classic octagonal model, and other Italian manufacturers like Alessi and G.A.T. Cheaper off-brand pots work, but they often have thinner metal, weaker gaskets, and looser tolerances that cause leaks.
Expect to pay $25 to $40 for a reliable 3-cup or 6-cup model.
Look for pots with a well-fitting gasket and a sturdy handle that doesn't conduct heat. The safety valve should be clearly visible and easy to clean.
Avoid pots with plastic parts that sit near the heat source—they warp over time.
If you're new to moka pots, start with a 3-cup aluminum Bialetti. It's forgiving, inexpensive, and easy to replace if you damage it.
Once you understand how it works, you can upgrade to stainless steel or experiment with larger sizes.
For further technical data on specialty standards and the chemistry of a perfect cup, the Specialty Coffee Association offers authoritative industry resources.
However, if you want to see how these principles apply to real-world gear, our hands-on Bialetti Moka Express Review explores how to achieve professional-level extraction at home without the steep learning curve of a commercial machine.
"We spent weeks sifting grounds and measuring extraction yields to find gear that doesn't just work, but lasts. You can find our top-performing picks in our definitive lab review: The 7 Best Manual Coffee Grinders for Pour Over: Precision Brewing in 2026."
Frequently Asked Questions
Is moka pot coffee the same as espresso?
No. Moka pots produce strong, concentrated coffee, but they don't generate enough pressure to make true espresso.
Espresso machines use 9 bars of pressure and force water through finely-ground coffee in 25 to 30 seconds, creating a thick crema and intense flavor.
Moka pots use only 1 to 2 bars of pressure and take four to five minutes to brew. The result is closer to espresso than drip coffee, but it lacks the crema, body, and complexity of real espresso.
Why does my moka pot coffee taste bitter?
Bitterness usually comes from over-extraction. This happens when you leave the pot on heat too long, especially during the final gurgling phase when steam pushes through the grounds.
Remove the pot from heat as soon as the coffee stream turns pale or you hear deep gurgling.
Running the base under cold water stops extraction immediately. Other causes include grind that's too fine, heat that's too high, or stale, over-roasted coffee.
Can I use regular ground coffee in a moka pot?
It depends on the grind size. Pre-ground coffee labeled "drip" or "all-purpose" is usually too coarse and will produce weak, watery coffee.
You need a medium-fine grind, similar to pre-ground espresso or slightly coarser. If you're grinding your own beans, aim for a texture like table salt, not powder.
If your coffee tastes weak, grind finer. If it tastes burnt or sputters violently, grind coarser.
How do I clean a moka pot?
Rinse the pot with warm water after each use and wipe it dry. Don't use soap—it can leave residue that affects flavor.
Disassemble the pot completely and rinse each part, including the gasket and filter plate. Once a month, soak the gasket in warm water to remove coffee oils.
Replace the gasket when it becomes hard, cracked, or no longer seals properly. Never put aluminum moka pots in the dishwasher—it damages the finish and can cause discoloration.
What size moka pot should I buy?
Buy the size that matches how much coffee you drink in one sitting. If you typically drink one mug of coffee, a 3-cup moka pot is right. If you drink two mugs or share with someone, get a 6-cup.
Remember that moka pot "cups" are 2-ounce espresso servings, not full mugs. Don't buy a large pot thinking you can brew smaller amounts—moka pots must be filled completely to work correctly.
Final Verdict
A moka pot is a practical, affordable way to make strong coffee at home if you're willing to pay attention and learn the process.
It won't replace an espresso machine, and it's less forgiving than a drip coffee maker, but it's portable, durable, and produces coffee that's far more concentrated than most automatic brewers.
The main trade-off is consistency. Small mistakes in heat, timing, or grind size have a big impact on flavor, and you can't walk away during brewing.
This method works well for people who drink one or two cups of strong coffee daily, who don't mind standing at the stove for five minutes, and who want to avoid the cost and complexity of espresso equipment.
It's less suitable for people who want convenience, who brew large batches, or who prefer lighter, more delicate coffee flavors.
If you're drawn to the ritual of making coffee and you're comfortable experimenting to get it right, a moka pot is worth trying. If you want consistency and automation, stick with drip or invest in a good espresso machine.